DOORS Next widget setup quick start
Extend IBM DOORS Next with custom widgets—security allowlists, Liberty deployment, and IBM’s widget catalog, all in one place.

Extend IBM DOORS Next with custom widgets
This guide gets you running with custom DOORS Next widgets as fast as possible.
Think of custom widgets as the features and shortcuts that DOORS Next does not include. You can also build your own.
Widgets fill those gaps. They automate repetitive tasks and save hours in review and workflow, so you spend your time on engineering.
This guide covers each step, from environment setup to deployment.
Getting started – security first
IBM security settings block widgets and RSS feeds that load from external URLs. You then see errors like this:
“The OpenSocial gadget was not loaded (CRJAZ5037E)”
Do these steps first, or your custom widgets will not load:
- Add Your Hosts to the JTS Allowlist
- In Jazz Team Server, go to Admin → Advanced Properties.
- Search for
externalResources.allowlist. - Enter each base URL where you host your widget extensions, separated by commas (no spaces).
- (Tip: during testing, use
*to allow all external calls. Do not do this in production.)
- Whitelist URLs in Your DOORS Next (or Other RM) App
- Navigate to
https://<your-domain>/rm/admin. - Under Communication → Whitelist, add the same URLs one at a time.
- Navigate to
- Wait for Changes to Propagate
- It can take up to 10 minutes for your updates to kick in.
After that, your custom widgets load without errors. You can also turn on SSO token passing if your widgets need it.
Full setup details are in IBM’s documentation. This guide covers only what you need to start.
Configure Liberty server
Step 1. Enable drop-ins monitoring
By default in a standard CLM/ELM Liberty profile, the <applicationMonitor> element has dropinsEnabled="false". You must turn it on so Liberty will auto-deploy anything you drop into dropins:
<server>
  …
  <applicationMonitor dropinsEnabled="true" .../>
  …
</server>
This tells Liberty to watch the dropins/ folder for new WARs (or WAR-directory projects) and deploy them automatically. Of course you will have to stop and start Liberty again before this change is enabled.
Step 2. Deploy your widget assets via drop-ins
- Under your server directory (e.g.
/liberty/servers/clm/dropins/), create a folder named exactly:dng_extensions.war - Inside
dng_extensions.war/, drop all of your widget files (pure.js, HTML, CSS, images, etc.). - Save and wait—Liberty will detect that directory and deploy it at:
https://<your-host>:<your-port>/dng_extensions/(you can verify by browsing to one of your static files).
With dropinsEnabled set to true, Liberty deploys dng_extensions.war automatically.
If this step fails, a reverse proxy in front of the server is the usual cause. Use a test environment you control, or ask your administrators for the server names and proxy configuration you need.
Grab IBM’s catalog of widgets
To start quickly, register for a Jazz.net account and download the IBM sample widget files. They include examples and, most important, the custom widget catalog.
Step 1. Upload the sample files
Download the zip file, extract it, and upload the contents to dng_extensions.war on your Liberty server.
Check that the catalog is reachable: open its URL in a browser (for example https://<your-host>:<your-port>/dng_extensions/WidgetCatalog.xml). You should see the XML. If the zip extracted into a subfolder, include that folder in the URL.
Step 2. Register the catalog in DOORS Next
DOORS Next does not find the catalog on its own. You must tell it where the catalog is, or no custom widgets appear in the widget list:
- Open the RM application admin page at
https://<your-host>:<your-port>/rm/admin. This is the RM admin, not the JTS admin you used for the allowlist. - Choose Advanced Properties.
- Find the RM Client Component section and the
com.ibm.rdm.widgetcatalog.internal.WidgetCatalogentry. - In User Extension Catalog URL, enter the full URL of the
WidgetCatalog.xmlfile you uploaded, for example:https://<your-host>:<your-port>/dng_extensions/WidgetCatalog.xml - Click Save at the top of the page.
Step 3. Add widgets to your mini dashboard
Wait a few minutes or restart the server. Then open your mini dashboard and add custom widgets:
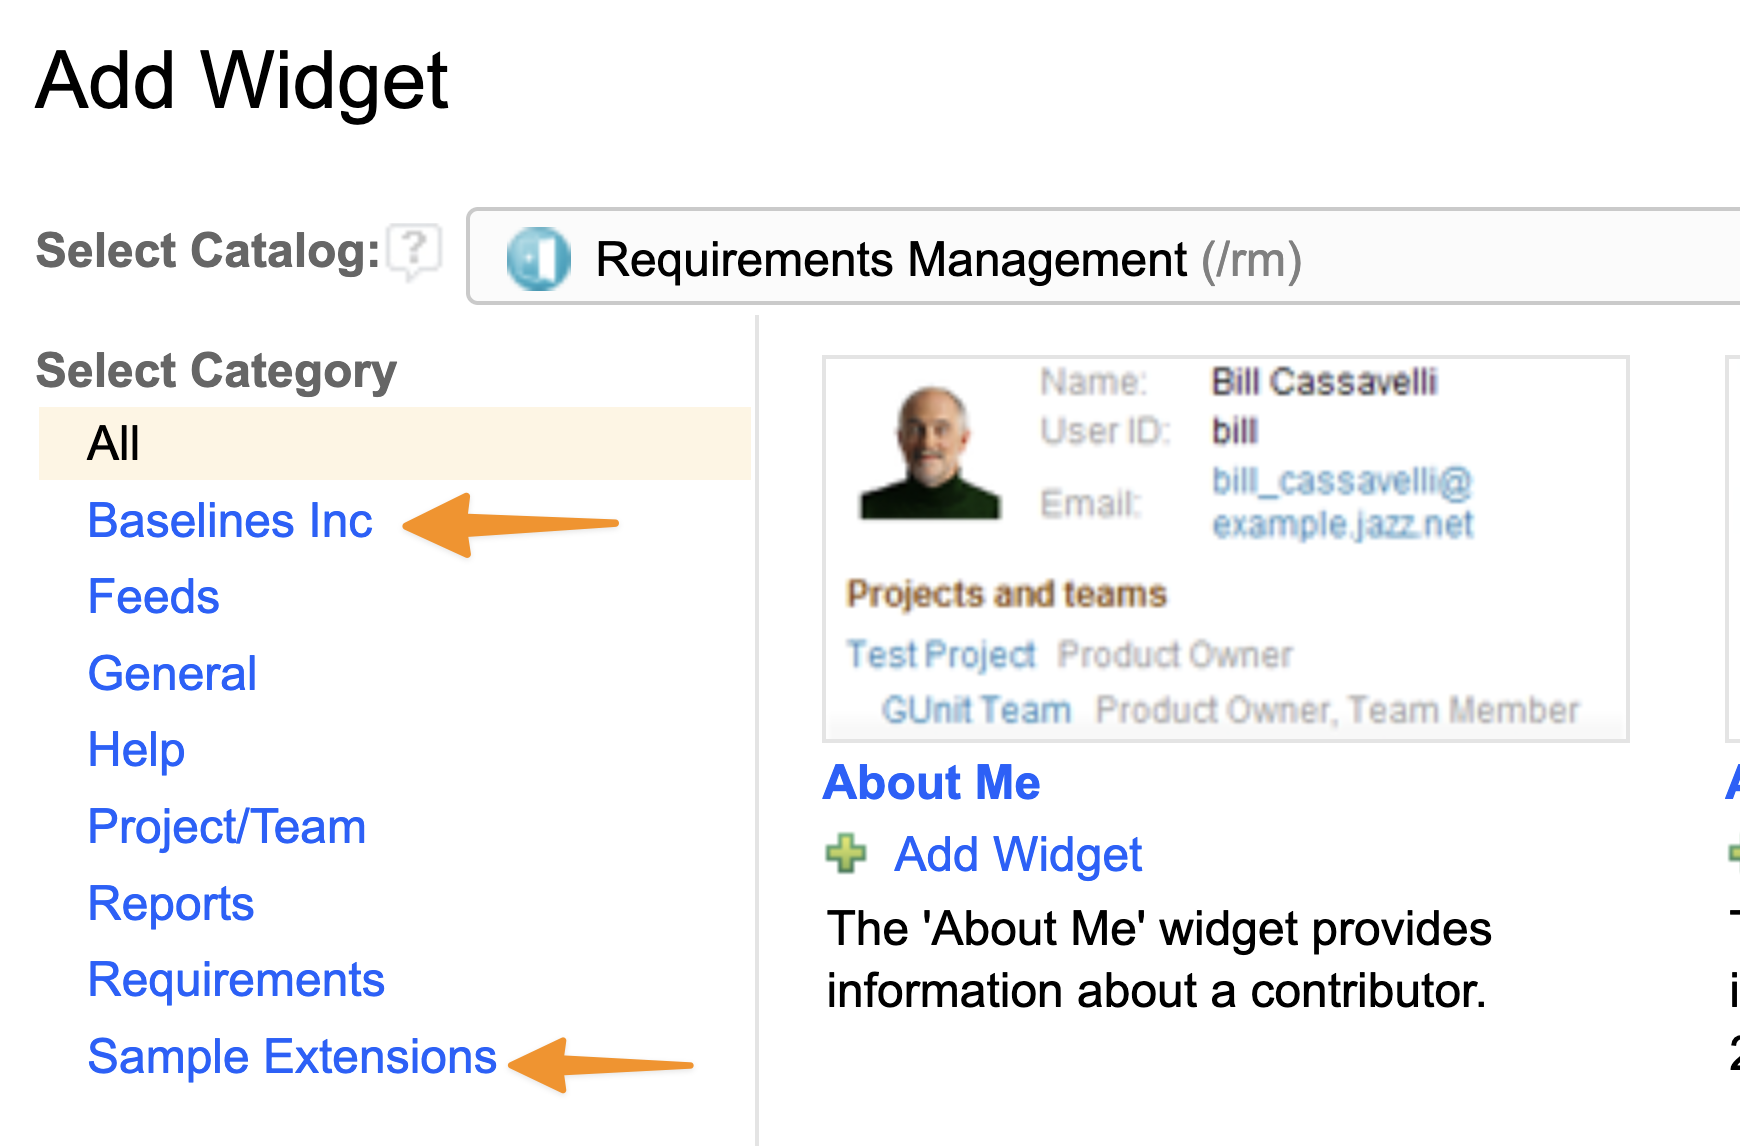
Your custom widgets are now available.
Ready-made DOORS Next widgets
If you do not want to build your own, our widgets add features that DOORS Next does not include. They automate repetitive tasks and make DOORS Next easier to use, without custom development.
See the full catalog at doorswidgets.com.
Talk to an ELM consultant
Tell us about your IBM ELM setup and what you need. A senior consultant will follow up.